Guide to Troubleshooting Hard Drive Detection Issues on Windows
Guide to Troubleshooting Hard Drive Detection Issues on Windows
Sigorta Haber30 Nisan 2025
0 Yorum Yapıldı
Bağlantı kopyalandı!
Understanding the Issue: Why Isn’t My Hard Drive Showing Up in Windows?
Note: If your hard drive is suffering from physical damage, it’s best to consult a professional repair service or the manufacturer for a fix. The solutions provided here are intended to address logical errors that might be causing your drive to not be recognized by your computer.
If your hard drive is not appearing in Disk Management, it could be due to a variety of reasons such as connection problems, driver issues, incorrect BIOS settings, or other factors. Below is a list of symptoms and potential causes:
Symptoms of a Non-Showing Hard Drive
Potential Causes
Hard drive isn’t visible in File Explorer
Hard drive appears as ‘Disk Unknown’ or ‘Uninitialized’, even if new
Hard drive is marked as RAW in Disk Management
Hard drive lacks a drive letter or shows a yellow exclamation mark
Faulty connection
Unsupported or corrupted file system
Drive letter conflict
Outdated hard drive driver
Hard drive uninitialized or not partitioned
Physical damage to the hard drive
Fortunately, these issues can be resolved. The following sections outline various solutions to make your internal or external hard drive recognizable on your Windows PC once more.
Part 1: Solutions to Fix Hard Drive Not Showing Up in Windows 10
This section covers fixes applicable to both internal and external hard drives, aiming to resolve detection issues in Windows 10/8/7. Choose the appropriate solution based on your hard drive’s current state and follow the steps provided:
Solution 1: Adjust the Disk Connection
Solution 2: Reformat the Hard Drive to NTFS
Solution 3: Recover Data and Create a New Partition
Solution 4: Change the Hard Drive Letter
Solution 5: Update the Hard Drive Driver
Solution 6: Initialize the Disk in BIOS, Create Volume, and Enable Disk
Solutions 1 to 5 are primarily for used hard drives, while Solution 3 and Solution 6 are recommended for new hard drives that are not recognized. Let’s delve into these solutions:
Solution 1: Change Disk Connection
If your internal or new hard drive isn’t detected in File Explorer or Disk Management, the problem may lie in the connection. This often results from faulty cables or loose connections. Follow these steps to resolve the issue:
Step 1: Check all cables. Replace any damaged power or SATA cables.
Step 2: Reconnect your hard drive securely using the SATA and power cables.
Step 3: Restart your computer to see if the hard drive is now detected.
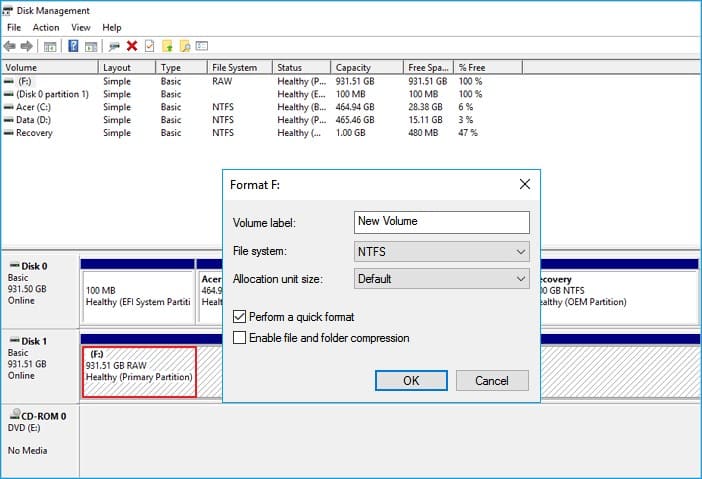
Solution 2: Format Hard Drive to NTFS
If your hard drive is not detected due to an unsupported, RAW, or damaged file system, reformatting it to a supported file system like NTFS can resolve the issue:
Step 1: Press Windows + X and select “Disk Management” in Windows 10/8. For Windows 7, click the Start icon and search for “Disk Management”.
Step 2: Locate your hard drive, right-click it, and select “Format”.
Step 3: Choose NTFS as the file system, check “Perform quick format,” and click “OK”.
Solution 3: Recover Data and Create New Partition
If your hard drive appears as unallocated or unknown, or a new drive is uninitialized in Disk Management, follow these steps:
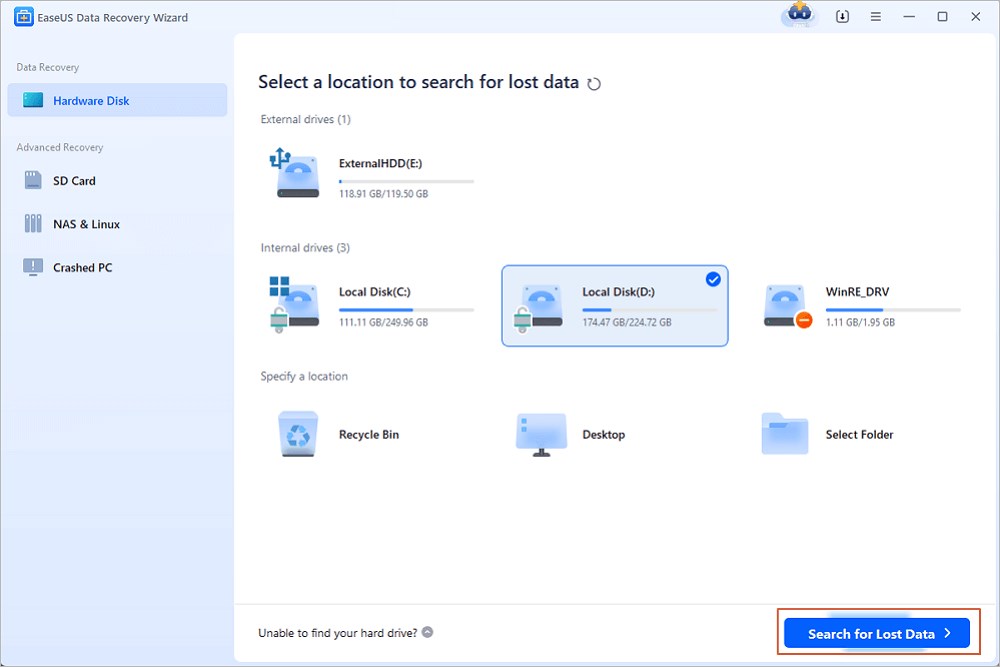
1. Recover Data from Unallocated Hard Disk: Use a professional data recovery tool like EaseUS Data Recovery Wizard. This software can scan lost partitions and retrieve files:
Step 1: Select the drive with lost data and click “Search for Lost Data”.
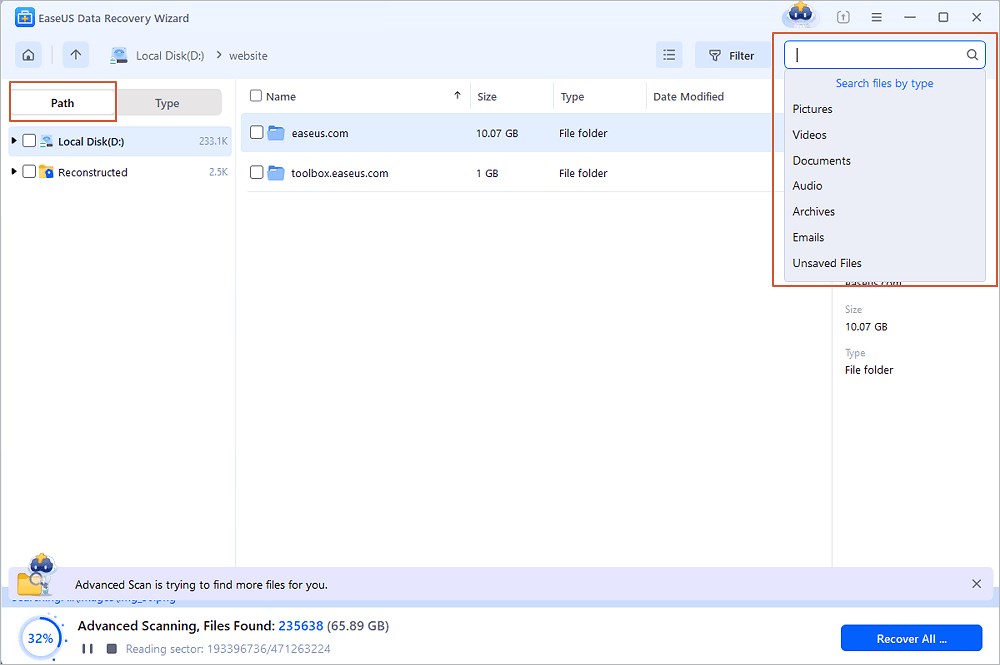
Step 2: Once scanning is complete, use the “Filter” or “Search” options to find the lost files.
Step 3: Select the files you wish to recover and click “Recover”. Save them to a safe location.
2. Create a New Partition to Make Hard Drive Detectable:
Step 1: Right-click “This Computer”, select “Manage”, then “Disk Management”.
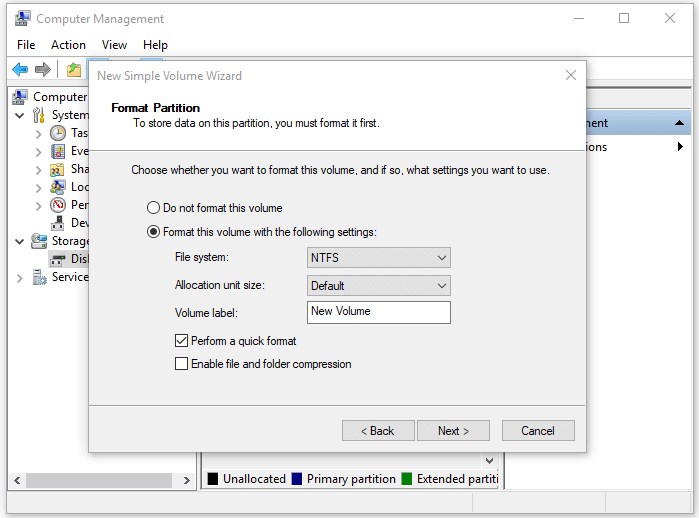
Step 2: Right-click the unallocated space and select “New Simple Volume…”.
Step 3: Follow the wizard to set volume size, assign a drive letter, and set the file system to NTFS.
Step 4: Click “Finish” to complete the process.
Solution 4: Change Hard Drive Letter
To resolve conflicts caused by drive letters, change the drive letter following these steps:
Step 1: In Disk Management, right-click the drive marked as New Volume or lacking a drive letter.
Step 2: Select “Change Drive Letter and Path” and click “Change” in the new window.
Step 3: Assign a new drive letter and click “OK”.
Solution 5: Update Disk Drivers
If your hard drive displays a yellow exclamation mark in Disk Management, update the driver:
Step 1: Right-click “This Computer” and select “Manage”.
Step 3: Right-click the problematic drive and select “Update driver”.
Step 4: Choose “Automatically search for updated driver software”.
Solution 6: Initialize, Create and Activate Disk in BIOS
If the hard drive is new, follow these steps:
1. Initialize and Create Volume:
Step 1: Right-click “This Computer” and select “Manage”.
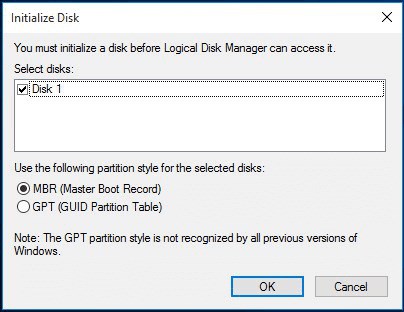
Step 2: In “Disk Management”, right-click the new hard disk and select “Initialize Disk”.
Step 3: Choose MBR or GPT as the partition style and click “OK”.
Step 4: Right-click unallocated space and select “New Simple Volume…” to set up.
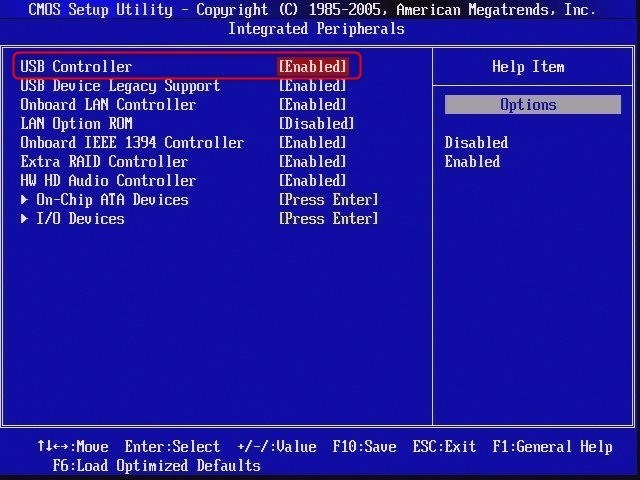
2. Enable in BIOS:
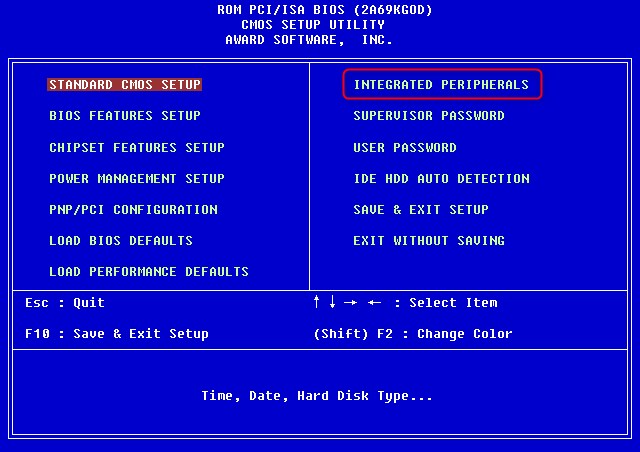
Step 1: Restart and press F2 or Del to enter BIOS.
Step 2: Navigate to “Integrated Peripherals” and press “Enter”.
Step 3: Ensure the “USB Controller” is set to “Enabled”.
Step 4: Save changes and exit BIOS.
Part 2: Troubleshooting External Hard Drive Issues
If your external hard drive isn’t showing up, try the following solutions:
Solution 1: Replace USB Cable/Port and Reconnect
Solution 2: Format as NTFS/exFAT
Solution 3: Reinstall Disk Driver
Solution 4: Update USB Controller Drivers
Solution 1: Replace USB Cable/Port
Step 1: Try a new USB cable if the current one is damaged.
Step 2: Switch USB ports and reconnect the drive.
Step 3: Attempt connection on a different computer.
Solution 2: Format as NTFS/exFAT
Step 1: Keep the drive connected.
Step 2: Open Disk Management, right-click the drive, and select “Format”.
Step 3: Choose “NTFS” or “exFAT” as the file system.
Step 4: Click “OK” to format.
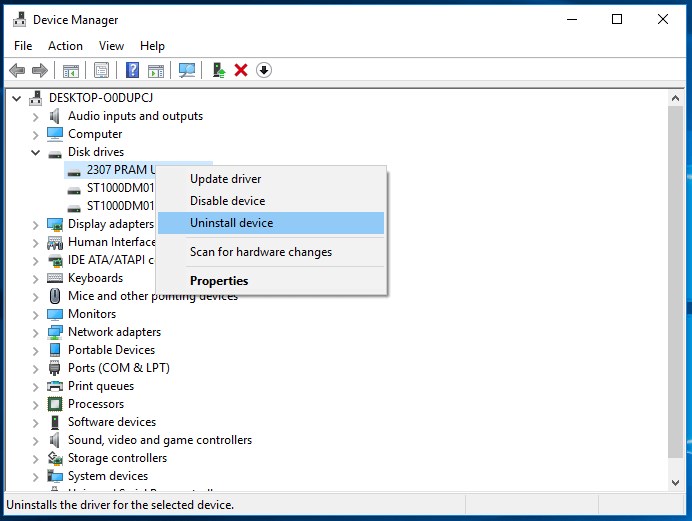
Solution 3: Reinstall Disk Driver
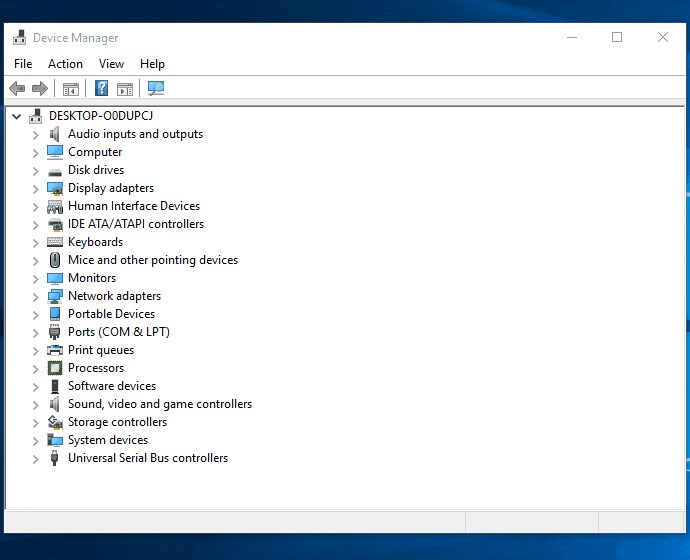
Step 1: Open “Device Manager” and expand “Disk drives”.
Step 2: Right-click the drive with a yellow exclamation and select “Uninstall device”.
Step 3: Restart your PC and reconnect the drive.
Solution 4: Update USB Controller Drivers
Step 1: Access “Device Manager” and expand “Universal Serial Bus controllers”.
Step 2: Right-click “USB Root Hub” and select “Update driver”.
Step 3: Follow prompts to update automatically.
Part 3: Bonus Tips for Missing Files
In some cases, files might be hidden or missing due to various reasons:
Files hidden by malware or viruses
Accidental deletion
Unrecognized file system
Recover Hidden or Deleted Files: Use EaseUS Data Recovery Wizard to restore your files.
Scan for Malware: Run antivirus software to remove threats.
Format Drive: To restore drive capacity and set the file system to NTFS.
Conclusion
This comprehensive guide has provided solutions for resolving hard drive detection issues on Windows PCs, ensuring your external or internal hard drives, whether new or used, become visible again without data loss. These methods can also be applied to USB drives and SD cards.
Frequently Asked Questions
Here are some common questions related to hard drive detection issues:
Q1: What should I do if my internal hard drive is not detected?
A1: Check connections, change drive letters, recover lost data, update drivers, and enable in BIOS.
Q2: How does Windows 10 recognize a new hard drive?
A2: Ensure proper connection, initialize the drive, assign a drive letter, and enable it in BIOS.
Q3: Why doesn’t my hard drive show up on Mac?
A3: Check connections, Finder settings, USB port issues, and ensure macOS and firmware are up to date.


Yorum Yap